
Chat
Ask your AI Agent to change your app, add context, and review the result.
Chat lets you ask your AI Agent to change your project files. Select the page or component you want to work on, describe the result you want, then review the change in the preview and your files.
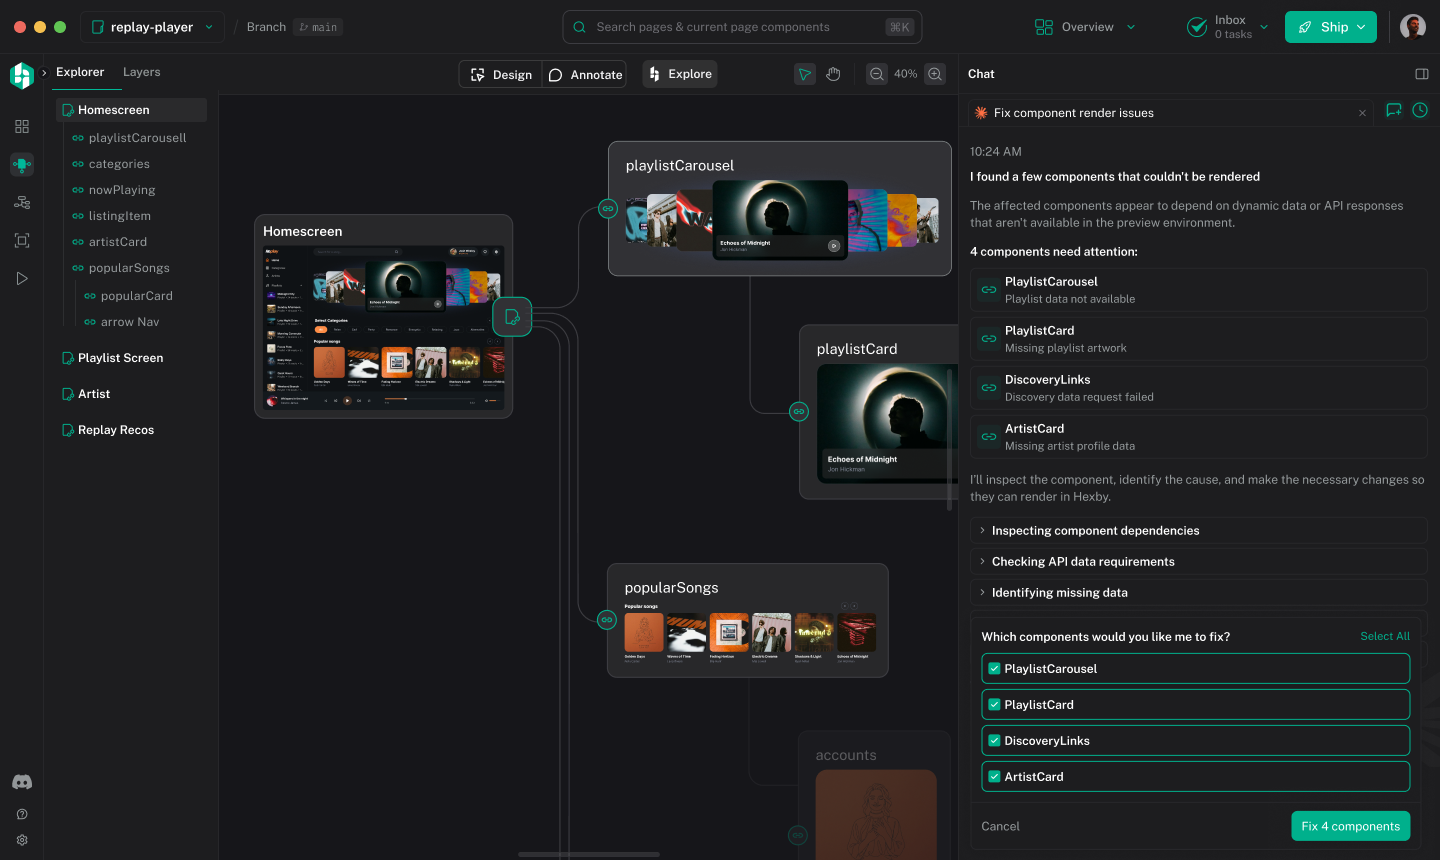
Use Chat for changes that need code edits, such as adding a search field that filters a song list. For a visual adjustment to a selected element, use Design mode. Use Explore to compare generated design alternatives, or Create a plan to agree on implementation steps before work begins.
Start a chat and make a change
-
Open Chat in the right panel.
-
Click New chat and choose an AI Agent. To connect one, see AI Assistant.
-
Select the page or component on the canvas. Check the context shown above the message field.
-
Describe the change and how you will check it. For example:
Add a search field above Popular songs. Filter the list as I type, show a “No songs found” message when nothing matches, and restore the full list when I clear the search. Keep the current card design.
-
Click Send message and wait for the agent to finish. Check the search with a matching title, a title with no match, and the clear action. If one case does not work, describe that case in a follow-up message.
Each chat uses the agent chosen when it was created. To use another agent, start a new chat with that agent. Your agent can edit project files as it works, so review its changes before sharing them.
Add context and references
The items above the message field show the context sent with your request. Check them after selecting something else on the canvas. Click × on an item to remove it. For a file chip, double-click it to keep that file in context; double-click again to unpin it. A pinned file stays in context when you change the canvas selection.
To add a component or project file, type @ in the message field and choose an item from the suggestions. You can also click + → Add context.
To attach a reference, click + → Upload from computer, then choose a supported image, PDF, or text file. You can also drag a file into Chat or paste an image. Image support depends on the agent. Wait for an attachment to finish loading before you send the message, and explain what the agent should use it for.
For example:
Use the attached screenshot as a reference for the search field. Keep our existing colors and use the components already in this project.
Use Annotate in Preview App to point to an exact element on screen.
Choose how your agent works
Choose a model from the menu beneath the message field. Open Session settings with the sliders icon to see other options your agent provides. Available models and settings depend on the connected agent.
Type / at the start of a message to see commands your agent makes available. Commands differ between agents.
Guide work in progress
If you send another message while the agent is working, it is queued by default. Use the controls beside the queued message to change what happens next:
| What you want to do | What to use |
|---|---|
| Add a follow-up for after this reply | Leave it queued. |
| Correct the current task | Choose Steer on a queued message, when available. The agent reads it at its next step. |
| Remove a follow-up | Click × beside the queued message. |
| End the current reply | Click Stop generating. |
Steer is available only for agents that support it. Stopping generation does not undo file changes. Check the preview and changed files before you continue.
Read the response and recover a change
- Review edits: Open files from the changed-files list. Expand tool entries for more detail.
- Respond to permission requests: The action waits until you choose an option.
- Ask for a fix: Send a specific follow-up in the same chat, such as “Clearing the search should restore the full list. Keep the current design.”
To undo from a request, hover over its message and choose Revert to here. Review the confirmation, then choose Revert or Cancel. The control may be unavailable while the agent is replying.
What reverting restores
Reverting removes messages from that point on. Saved files to be restored appear in the confirmation. If no files were saved, only the messages are removed; your files stay as they are.
Return to a chat
Use the tabs at the top of Chat to move between open conversations. Click Chat history to find an earlier session. If the agent can resume it, Chat continues the conversation. Otherwise, it opens as Read-only session from a previous run.
In a read-only session, choose Continue in new chat to start a fresh conversation with the same agent and a recap of the earlier messages. Choose New chat for a fresh conversation without that recap. The read-only transcript stays unchanged.
If something does not work
| What you see | What to do |
|---|---|
| The agent is not connected | Choose Connect if it is shown. If Chat says the agent is not installed on this machine, install or connect it using AI Assistant. |
| An action is waiting for permission | Read the request and select an available option. The action will wait until you respond. |
| An attachment is still loading | Wait for it to finish, check that it appears above the message field, then send. If it fails, try a supported file type or a smaller file. |
| The agent worked on the wrong page or component | Check the context items above the message field, remove the incorrect item, select the right canvas item, and send a correction. |
| A previous conversation is read-only | Choose Continue in new chat to carry over a recap, or start New chat without one. |
Check your changes
- Check the updated page or component in the canvas preview.
- Open Preview App and try the interactions affected by the change.
- Check Desktop, Tablet, and Mobile where those preview controls are available.
- Review the changed files in Chat or your code editor’s Git changes view.
Next step
Use Visual Review to compare your changes and share them with your team.